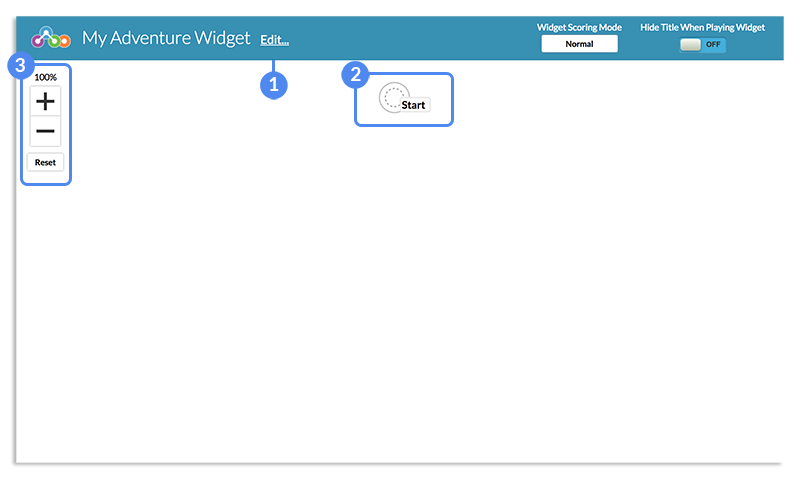
Choose Your Own Adventure is a powerful widget that allows for the creation of branching decision trees. Students are scored based on where they end up.
While building your Adventure widget, keep in mind: with great power comes great responsibility. Adventure allows you to create decision trees that are as simple or as complicated as you like. Keep the user's experience in mind while building the various pathways they may take through your widget.
Each point on the tree, known as a destination or node, represents a screen and possible interaction.

Click a blank destination and select "Edit" to choose a destination type.
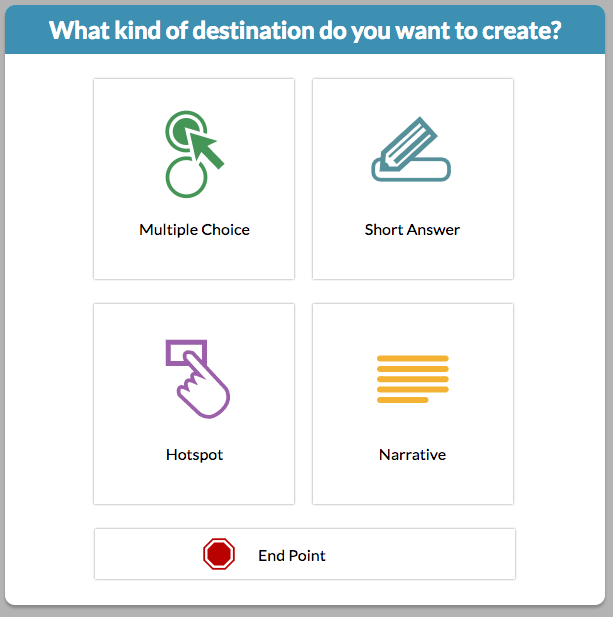
Each destination can be one of five different types:
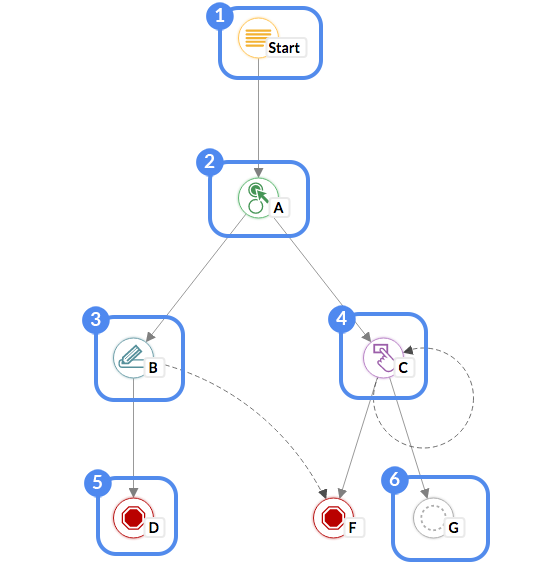
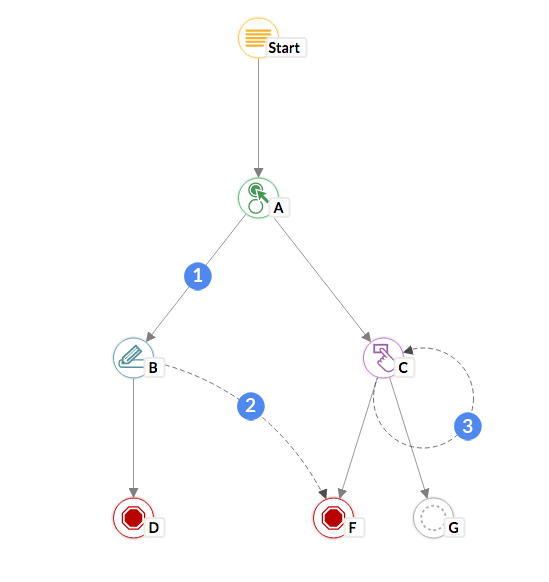
Each destination type is identified by an icon. An example tree is shown below:
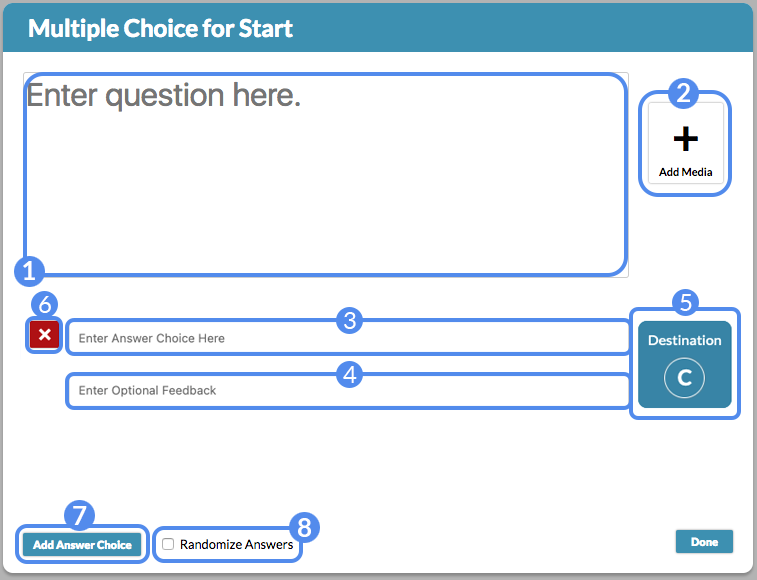
The Short Answer screen is very similar to the Multiple Choice screen, with the exception of how it handles answers. Users enter a response based on the question text or image.
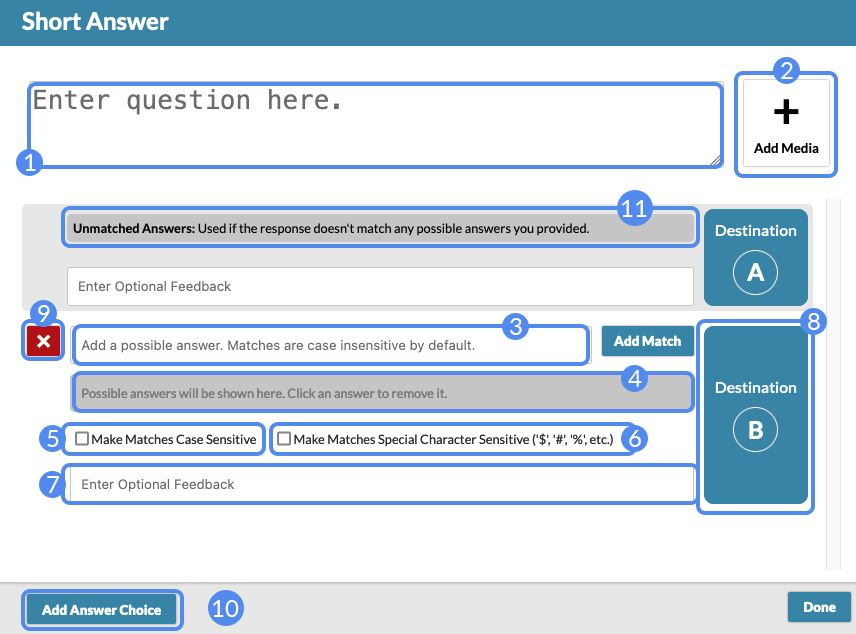
In the "Add possible answer" input box, you can enter a word or phrase to be matched against what the user will enter in the Short Answer input box when playing the widget. Type Enter or select "Add Match" to add it to the answer set. To remove a possible answer from the answer set, simply click on it.

Note: Single words or simple phrases are best for Short Answer responses. While the matches are not case sensitive, spaces and punctuation count.
The Hotspot creation screen provides tools to highlight and label parts of an image. Depending on the hotspot the user selects, they will be taken to a specified destination.
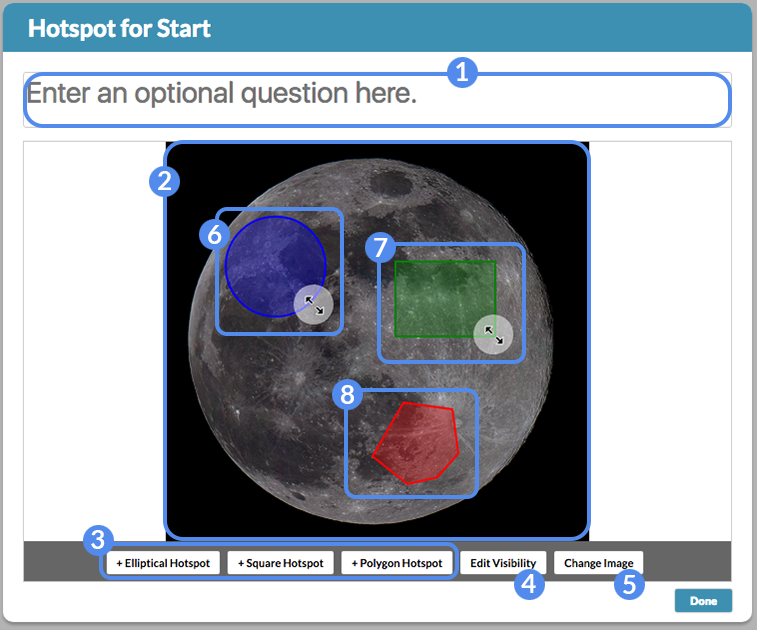
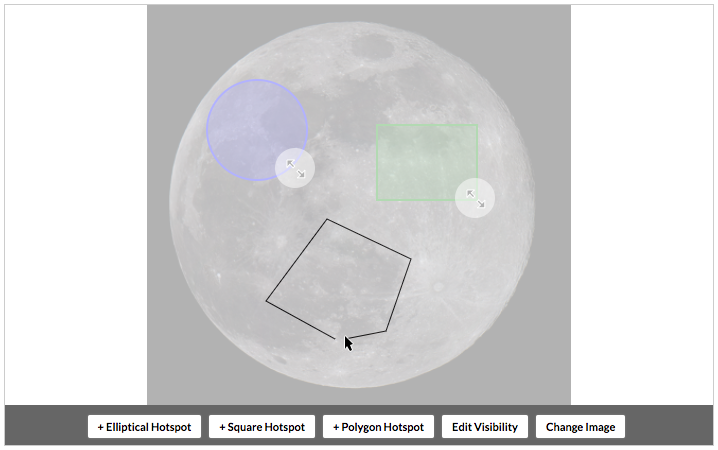
To draw a polygon, select the +Polygon Hotspot button. Click anywhere on the image to begin drawing the polygon. Once the first point is placed, each additional click on the image will add a new side to the polygon. Once you've drawn the polygon to your satisfaction, click near the very first point to "close" the polygon and create the hotspot.
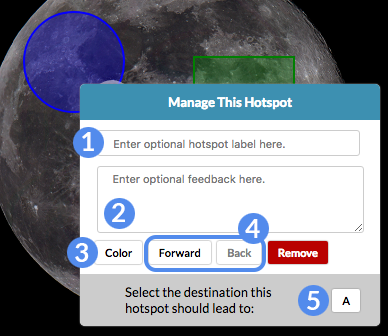
Once a hotspot is drawn on the image, selecting it brings up the hotspot dialog. To relocate the hotspot, click and drag it.
Selecting "Edit Visibility" lets you change the default visibility of hotspots. The options are:
Narrative screens do not have any sort of interaction, but rather provide transitional text or images between one destination and another.
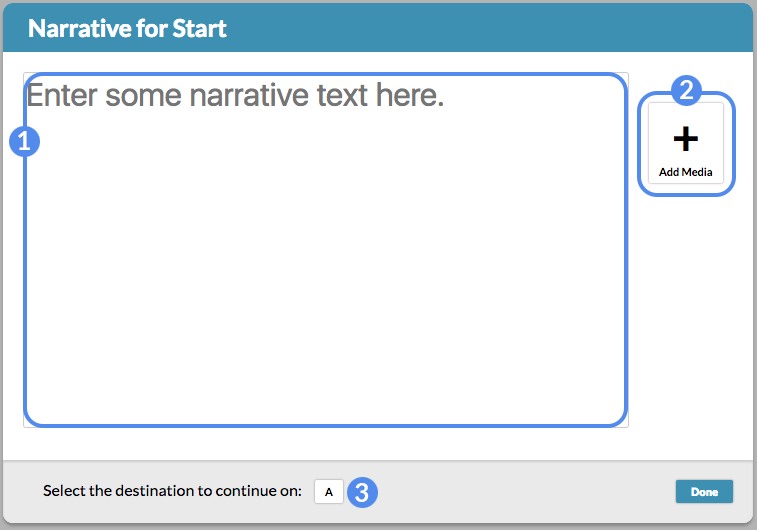
Endings are functionally identical to Narrative Destinations. Instead of selecting a destination to point to, endings provide a final score and end the widget.
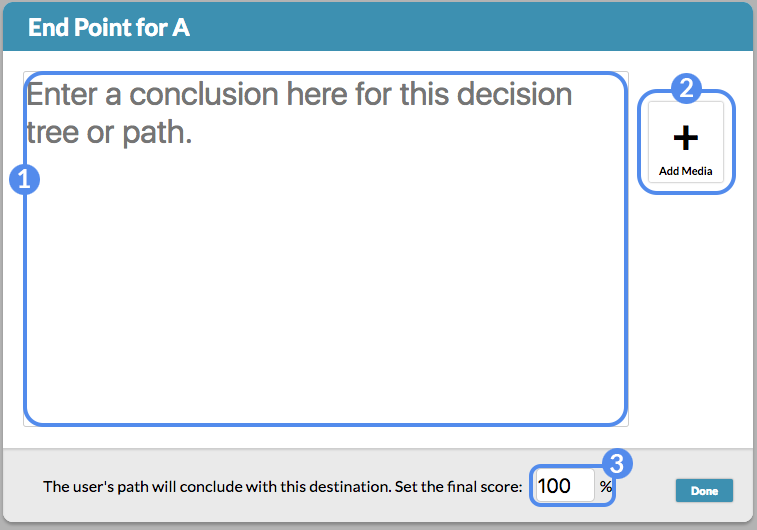
For any destination type besides Hotspot, selecting the Add Media button changes the layout of the destination to associate an image or video with the destination's text. The dialog option provides you with a choice between uploading an image or linking a YouTube or Vimeo video URL.
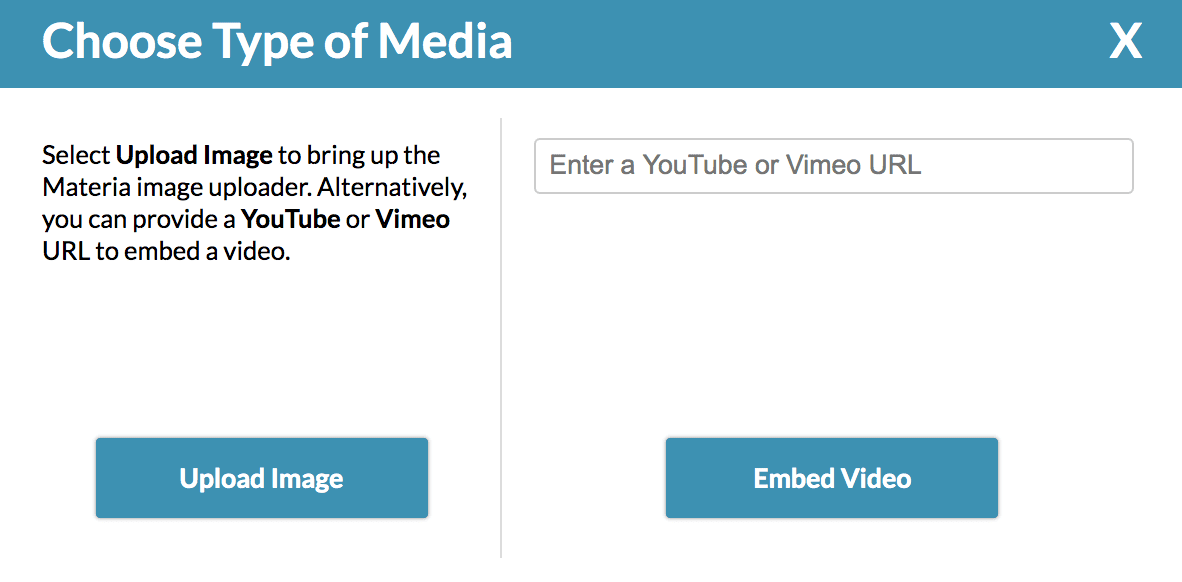
If you choose to upload an image, the image uploader will be displayed, where you can upload images from your computer, or select an image you've previously uploaded to Materia. Once you've selected an image or video, you can use the Swap with Question button below the media to switch the arrangement of the image and question text. Narrative and End Point destinations allow you to choose between vertical as well as horizontal arrangements. Select Change Media to choose a different image or video.
You have the option of creating different question text each time a player visits a destination. Click on the "Advanced Question Editor" at the top right of the node creation screen to open the editor.
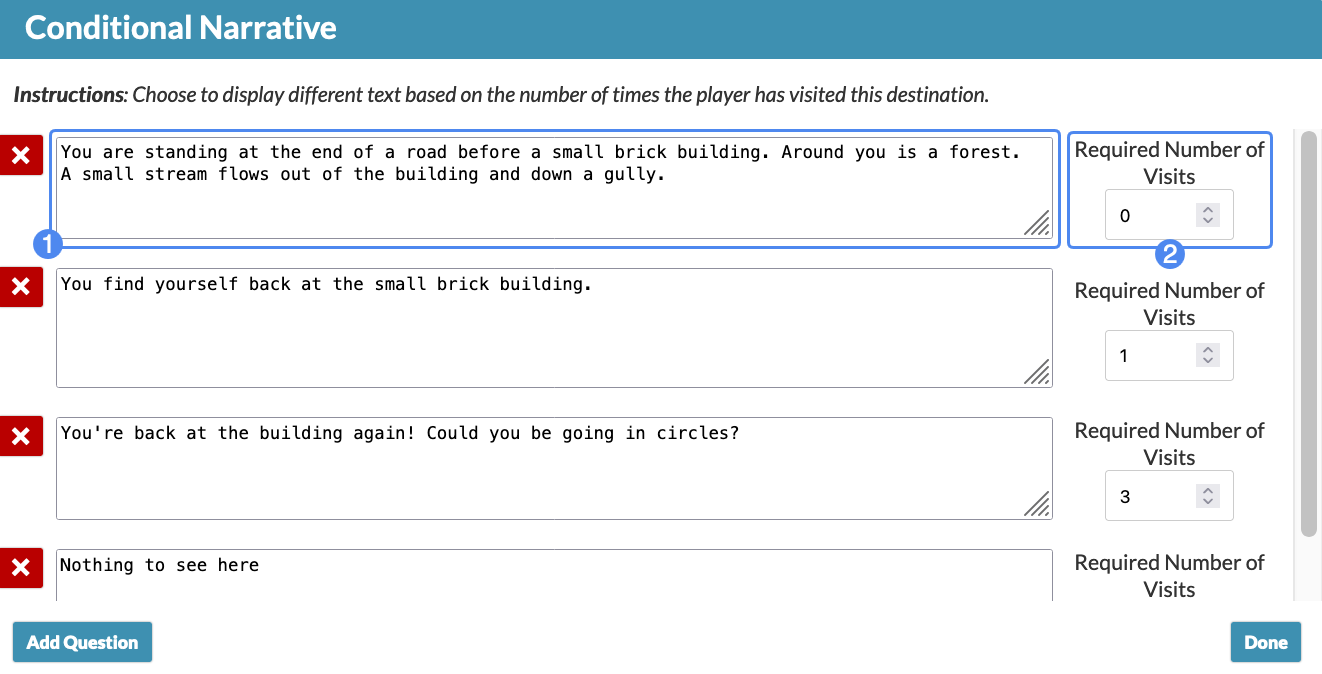
It will always display the question text with the most required number of visits met. For example, if a player has visited the node 2 times, it will display the second question above. If a player has visited the node 6 times, it will display the third question above.
Optionally, you can choose to use the inventory system. The inventory system allows you to give the player items or remove items from the player's inventory for each destination they visit.
Additionally, you can require the player to have certain items in their inventory to be able to select an answer option in Multiple Choice, Short Answer, or Hotspot.
To use the inventory system, you must first create the items. Click Add Inventory Items.
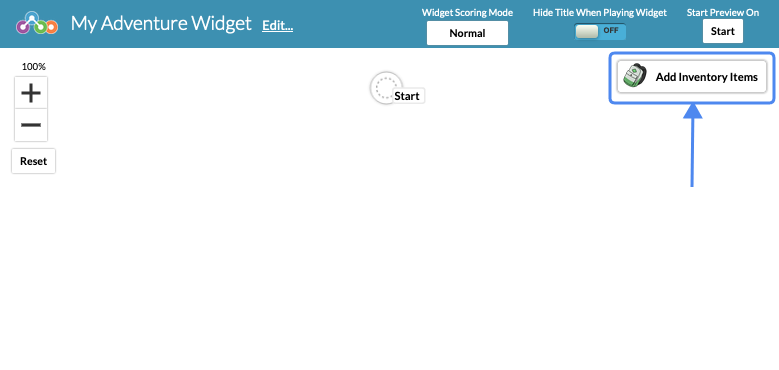
This will open the Item Editor where you can begin creating items.
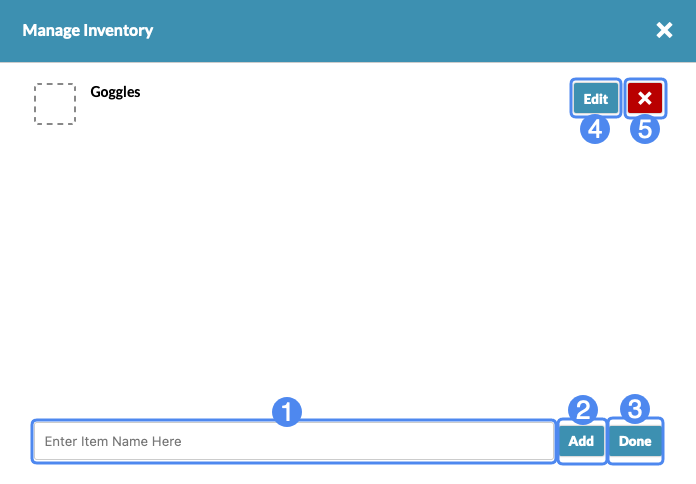
Clicking Edit will open the options for that specific item.
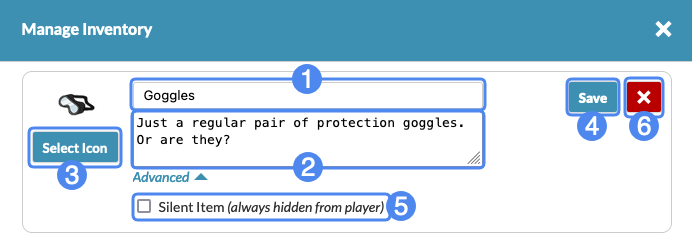
To add icons to an item, click Select Icon to open the Icon Selector.
![]()
Remove custom uploaded icons by selecting the icon in the icon selector and clicking Remove Selected Icon.
![]()
Once you have created the inventory items, an option to add items to destinations will appear in any destination besides End Point.
Selecting the Add Items button will display the item editor for individual nodes. Inside the editor, you can choose to add items to a player's inventory or remove items from a player's inventory.
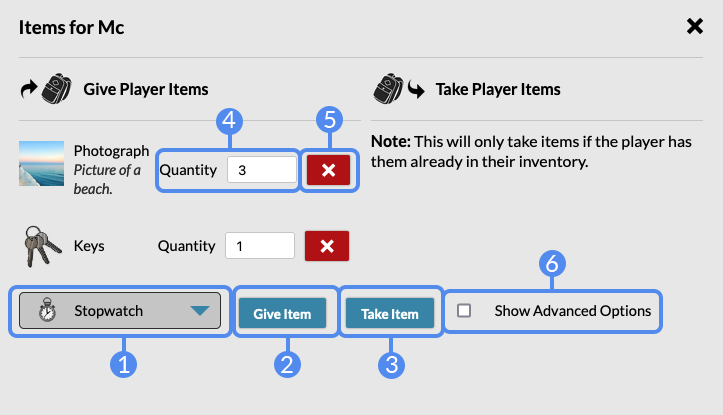
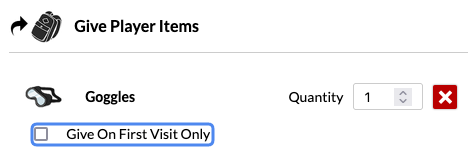
Selecting "Give On First Visit Only" will give the player the item only once upon their initial visit to a destination; if the player returns to this destination, they will not receive the item again.
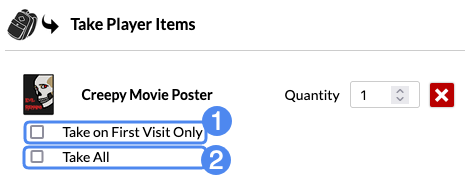
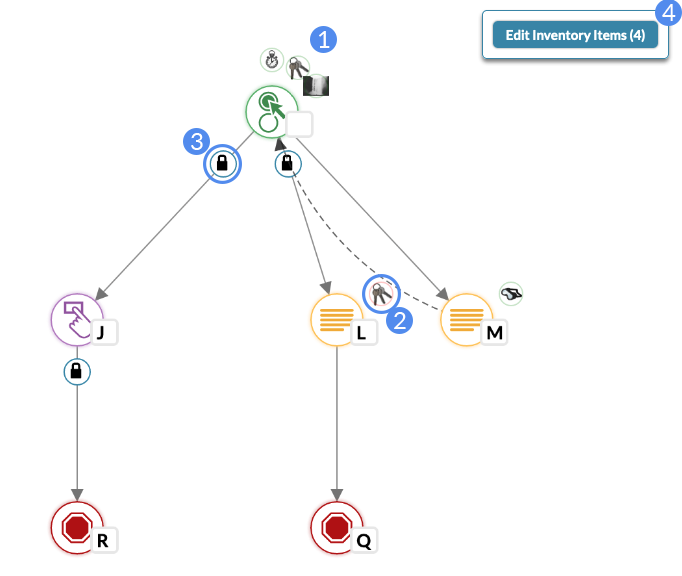
Once you have created items, an option to add required items to Multiple Choice Answers, Short Answer Match Sets, or Hotspots will appear in the respective destination types, as indicated by the lock icon (1). An additional setting appears in multiple choice and hotspot answers that allows you to hide the answer if the player does not have the required item(s), indicated by the "eye" icon (2).

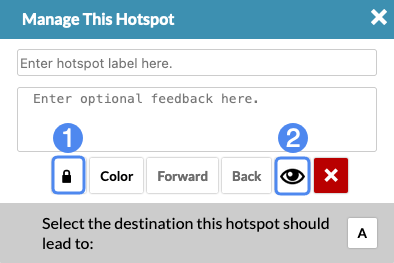

Although the image below was taken inside the Hotspot, the Required Item Editor appears and functions the same for each destination node type.
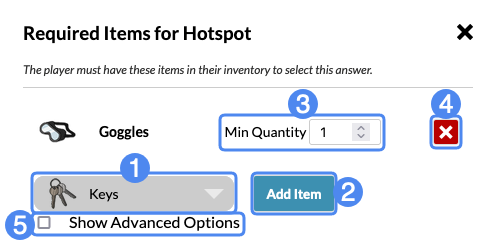
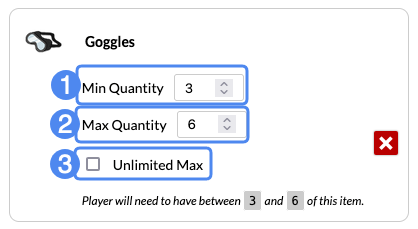
The advanced options allow you to set the required item amount to be within a specific range.
Once you have created items, an option will appear in the Advanced Question Editor to require items for each question text. You can require players to have certain items in their inventory in order to see different questions by clicking on the "Edit Required Items" button. This menu will operate similarly to the required items for answers from above.
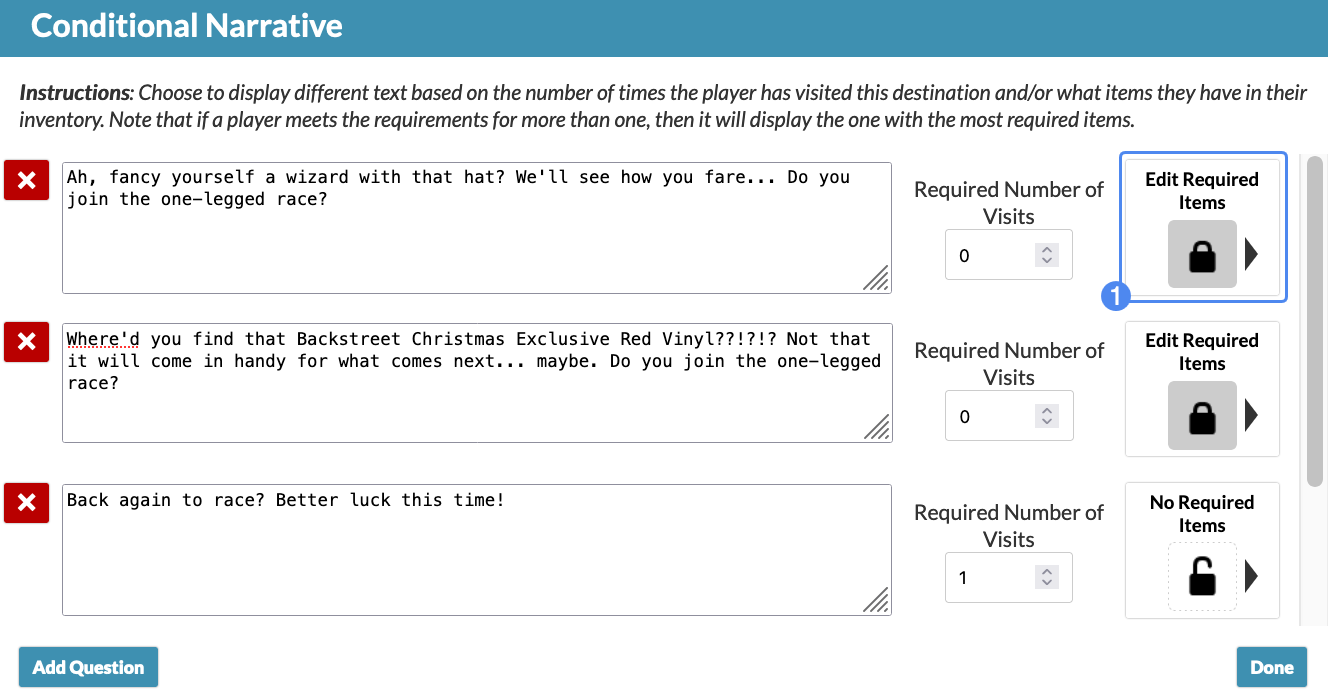
It will always display the question text with the most requirements met. For example, if the first question requires the player to have a hat, but the second question requires the player to have a hat AND a vinyl, it will display the second question if the player has both.
The Action History feature serves two purposes: first, it allows for immediate undo and redo options when required. Second, it allows you to traverse through previous actions and reset your work to a previous state. This way, you can easily recover from an unintended situation without having to re-create destinations or reload the widget and lose your work.
By default the Action History bar is minimized. Clicking the bar will expand the Action History window, listing all the individual actions you have performed during the current session. Note that Action History is not saved when the widget is saved; therefore, if you reload the page or revisit the creator later, it will not restore previous actions.
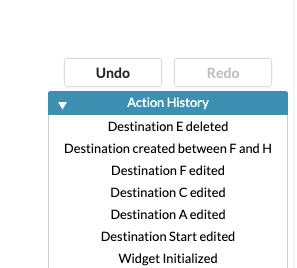
Actions, in this case, are defined as changes made to the decision tree: adding a new Destination, deleting a Destination, or making changes to a Destination's question or answer text, for example. Selecting an action from the list will restore the entire decision tree to the "snapshot" created just after the action was performed. In the above example, selecting "Destination created between F and H" would restore the decision tree to what it looked like once that action was performed. Destination E would still be present because the next action, "Destination E deleted", would not have occurred yet.
You can traverse the history of actions freely without losing your work. However, selecting an earlier action, and then making changes to decision tree from that point, will delete any actions created after that action was performed. As an example, selecting "Destination F edited", then making a change to the decision tree, would result in the deletion of the original actions created afterwards: "Destination created between F and H", and "Destination E deleted", in this example. They would be replaced by the new action performed on this "new" timeline.
With the exception of End Points, every answer for every destination in your tree will point to another destination. By default, when creating a new answer, Adventure will create a new, blank destination to which that answer will point. You can change where the answer points to by selecting the answer's destination button.

Depending on which of these three types is selected, the tree will change to indicate where the answer will point.
It's possible to add a new destination along a link in between two existing destinations. Simply hover your cursor over the midpoint of the link and select the "+" icon that appears.
In the example below, an in-between destination, I, was added between A and B:
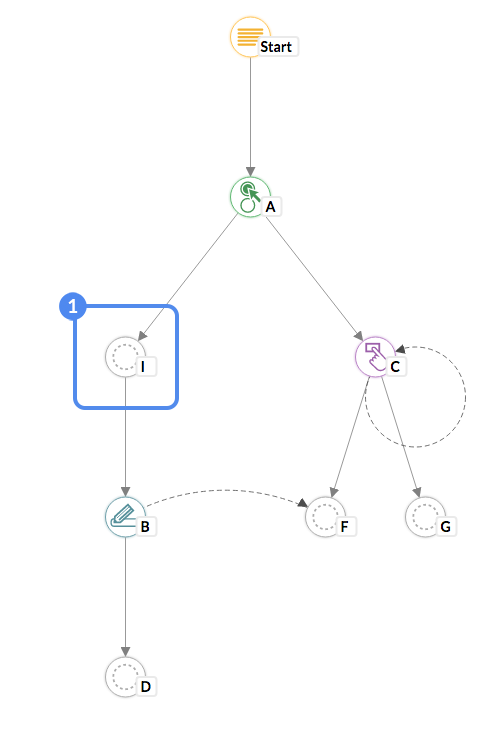
Note that a link exists between I and B, despite B being blank. When editing destination I, upon selecting a destination type, the first answer will automatically point to destination B.
When you select a destination, a small dialog provides a number of options in addition to simply editing it. Namely, Reset, Convert, and Copy.
Resetting a destination reverts it to a blank destination and removes all answers, including associated child destinations. A warning dialog will appear to inform you that the destination's sub-tree will be erased.
Converting a destination allows you to convert a destination to another type, with some caveats. Multiple Choice and Short Answer destinations can be converted to one another; the same with Narratives and End Points. Hotspot destinations cannot be converted.
Copying a destination will make a complete copy of the destination, including all of its answers and child destinations. In effect, the destination and its entire sub-tree are copied. Once the copy option is selected, you will be prompted to select another blank destination on the tree to be the copy target. The blank destination will be replaced by the copied destination and its sub-tree.
There are a few things to keep in mind when copying a destination:
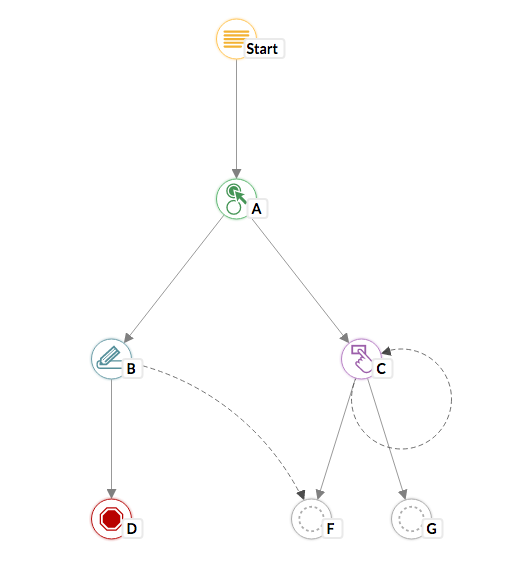
For this tree, we will make a copy of destination A, targeting destination F as the destination to be replaced.
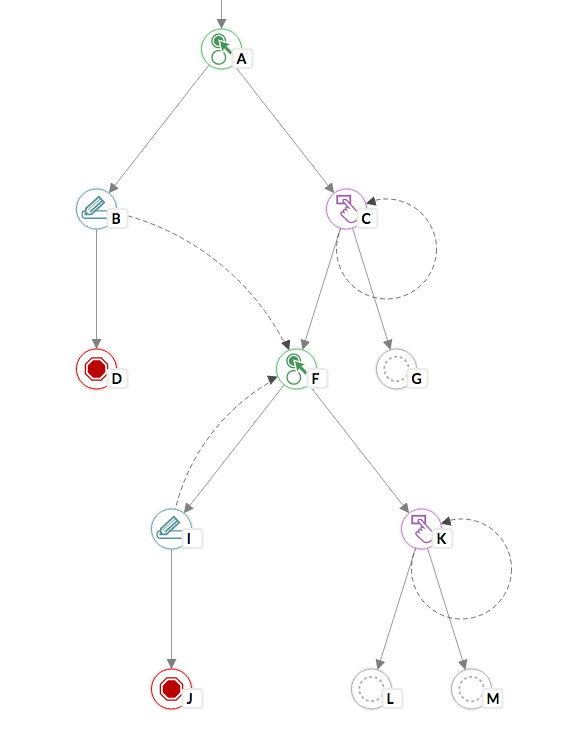
Note that destination F has become a copy of destination A, including destination all of destination A's child destinations. B, C, D, F, and G have become I, K, J, L, and M, respectively. Their answers point to the respective copies of the originals, with the exception of destination B's answer that originally pointed to destination F. The copied answer for destination I will continue to point to the original target, F.